|
Timpani & Percussion - Part
4
Its use with the modern Brass Band –
by Dave Griffiths
Dave Griffiths continues his series of articles on the art of percussion
playing, with the responsibilities of the Principal Percussionist.
See also: part 1 | part 2 | part 3
Continuing on from my previous article where focussed on playing
techniques of various percussion instruments, I begin this article
focussing on tuning drums . You might
recall I mentioned in Article One a few helpful pointers in relation
to tuning Timpani. In this article I look more closely to tuning
non-pitched drums, such as snare drums (and reducing “buzzing” snares),
tom toms and bass drums.
Following this information I have focussed on a number of recently
asked questions, including details of quality percussion suppliers.
The Art of Tuning a Drum
While veteran percussionists and drummers may not find many new
tips in this part of the article, newer players may find this article
interesting. Most of the information contained within this guide
is pretty much common knowledge in the drum world. Lots of
drummers will argue certain points that they don't agree with.
It's all a matter of taste and preference. No two drummers do the
same thing exactly the same way.
This article is broken down into the basic areas of drum sound
tweaking. Because of the vast amount of information that would
be introduced by including studio drum tuning tips; I've decided
to focus only on live drums as generally used as in a concert performance
with a brass band.
There are a few charts included. I found this the easiest way
to communicate certain types of information. If I mention a brand
name, it's just to give an example and NOT an endorsement (unfortunately).
Some names are clearly a product of my imagination.
HEAD SELECTION
Choosing the right head for you is as personal as choosing the
right stick or what kind of underwear to buy! It depends on which
drum it will be used on, what kind of music you play, environments
the heads will be used in (small venues, concert halls), and on
and on. Don't go out and buy a full set of Basher SheetMetal-Dot
heads just because your favourite drummer Rimshot Rackett uses
or endorses them! One thing to consider when choosing drum heads
for use with a brass band is that unlike a drummer playing in a
rock band, or a jazz quartet or Big Band, as a percussionist with
a brass band you are required to play various different music styles
and therefore your heads should be suitable for all-round general
use.
The sound most desirable from a drum whilst used in brass band
repertoire is a wide open sound. A “plain” medium or thin-coated
head won't muffle the sound too much and will give your drums more
life. By direct contrast, if you were working in a recording studio
with a small band the situation might be a little different. A “studio” head,
one that may be filled with oil, will make your soundman happy.
A "plain" head may introduce strange overtones in the
sound system that loves to feed back into your mics. But of course,
a good soundman can work with a live, resonant drum and have it
come out sounding like it should without worrying about feedback.
But that's another story…
WHICH DRUM
Kit bass drums don't demand much from a head other than durability.
While each type of head will sound slightly different on a bass,
it's unlikely that your listeners will notice your new fifty-pound
Thunder Whack batter head. Dampening should be used sparingly however,
for more information, revert back to my previous article where
I discuss dampening in more detail.
Toms and snares ARE picky when it comes to heads. You snare may
love a Silver Dot - your toms may hate them or visa versa. An average
drummer may hit his/her snare eighty times to every hit on a tom,
thus you might find a different type of head may be required on
your snare drum than on the toms. For general use however, I have
found that a Remo Coated Ambassador (or similar by Evans Heads)
are a good choice for brass band playing on the snare drum. See
my note below for my choice of supplier for all percussion heads,
spare parts, covers and instruments.
TUNING
Most drum kits these days have double-headed toms. Some drummers
say to tune the bottom head slightly different from the top. This
will deaden the drum's overall sound while, at the same time, broadening
its tone. Two medics carrying a stretcher will do a much better
job if both are moving at the same speed. Medics? Let me explain.
Let's say you have the bottom head tuned higher than the top head.
You hit the drum, which causes the top head to push the air down,
which in turn moves the bottom head downward. So, both heads are
vibrating. But , on some of the oscillations, the top head is pushing
the air down while the bottom head is pushing it up; hence, lessening
the distance each head will travel. While this technique isn't
wrong, it does have an effect on the sound. If you find your toms "way
too ringy," by all means, try this technique.
Bass drums also sound different depending on the presence of a
front head. Single-headed bass drums will be somewhat quicker,
but with less low end. Seventy-five percent of the time, people
dancing to a live rock band are subconsciously feeling the pulse
of the bass drum. If your bass drum doesn't create a worthwhile
vibration, the dancers won't have much fun. Oops, I'm drifting…
The only way to be a good tuner is to tune -- a lot! First off,
you have to decide what kind of sound you are trying to achieve.
If you want a gigantic, full-bodied, booming tom sound, but your
largest tom is a 14" Roto-Tom, you won't get it. If you want
an attention- getting big band sound, but you're using hydraulic
heads on huge power toms, you won't get it.
I'll start this section by explaining how to tune a drum, step by
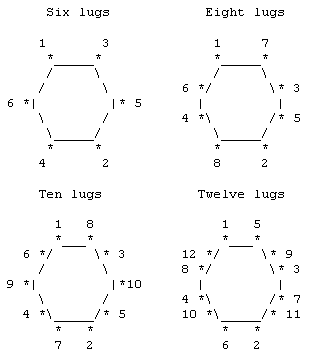
step, from the ground up. First, an ugly illustration (I'm sorry)
describing the order in which tension rods should be tightened or
loosened:
The idea is to keep the tension as even as possible around the
head, much like tightening the lug nuts when changing a wheel on
a car.
-
Before mounting the head, check the bearing edge for roughness
or bumps. It should be smooth to the touch. Look across it from
one side. It should be uniform in height.
-
Lay the head on the shell, mount the rim, and screw each tension
rod in finger-tight. With a drum key, tighten each rod one full
turn (360 degrees).
-
If you're using an old head OR a Calf Skin head, skip to step
4. Set your drum on the floor (on carpet to protect the bottom
of the shell) and apply pressure on the head, pressing up and
down slightly for a couple of minutes. You'll hear cracks and
pops as you "seat" the head onto your bearing edge
and as the resin used to hold the head into its bead cracks
into shape. Slam the edge of your fist into the head about
20 times. This will pre-stretch the head so it won't go out
of tune as quickly at first.
-
Tighten each rod about another full turn. Most of the wrinkles
should be gone at this point. If not, tighten each rod a quarter
turn until the head is smooth. The head should now produce some
sort of tone when struck.
-
Tap the head at the edge beside each lug. If the pitch is slightly
lower at one lug, tighten that rod until it matches the two points
next to it. Repeat until the same pitch is heard all the way
around the head. Getting the head IN TUNE now will make it easier
to tune when you finally tighten it up to the desired pitch.
-
Tighten each lug a quarter turn and check the overall pitch.
Repeat until the desired pitch is found.
-
One last time, tap around the edge and fix any inconsistencies
in the tuning of the head.
-
If you use double-headed drums, repeat with the bottom head.
Getting the bottom head of a tom to match the top head takes a
little extra work. The easiest way to hear the pitch of each head
at a time is to muffle one head while tapping softly on the other,
then switch.
Snare drums are a bit different. Basically, the more tension you
give the snare-side head, the better snare response you'll get.
Tuning snare drums takes a lot of experimentation for each drummer.
MUFFLING
For the most part, proper tuning techniques can eliminate the
need for muffling. Before you plaster your heads with tape, towels,
or Dead Ringers, try these tried-and-true techniques. Using loose,
floppy heads with tons of muffling will leave you with an expensive
set of cardboard boxes.
- Detune one rod or two adjacent rods on the batter head about
a quarter to a half turn. This has been known to be called "funky
tuning." It became popular in the '70s when funk was thriving.
- Increase or decrease the pitch of the bottom head. This is
described above.
- Change to a "studio" head (hydraulic). They produce
fewer overtones and result in a warm, wet sound.
If these tips don't help your drum or you don't like the results,
you probably need to muffle it somehow. Use muffling VERY sparingly.
Remember, what sounds good to you while you're playing may sound
bad at the other end of the room. To get rid of a slight high-pitched
ring, use a small piece of tape. You may have to move the tape
to different points on the head until you find the source of the
ring.
To get rid of a really annoying ring or overtone:
- Make a donut out of an old head. Don't waste money on commercial
versions. Find an old head the same diameter as the head you
need to muffle. Cut around the edge removing only the rim, but
leaving the edge flat. Now cut a smaller circle out of the inside
piece. The donut should be about 3/4" to 1" wide. Place
it on top of the drum's head. If the donut flies off at inopportune
moments, affix it to the head with SMALL pieces of tape stuck
to the rim.
I do NOT recommend the following types of muffling for toms and
snares:
- Filling the drum with toilet paper.
- Plastering the head with huge man made pads of cloth tied down
with tape.
- Using the internal mufflers on some drums. (Remove these to
prevent weird noises and buzzes.)
- Taping music onto a head!
While bass drums should be muffled, it can be overdone. Filling
the drum half full is too much.
I have found that during my years of experience playing with
brass bands that the nicest drum sounds most suitable for use with
a brass band is that of sounds produced by drummers such as Gene
Krupa, Buddy Rich and almost any big band drummer. Tuning methods
for this style of sound is as instructed below:
Snare:
With the snares off, the drum should sound like a medium-pitched
timbale with lots of ring and overtones. With the snares on, the
*slightest* tap of the stick should produce a crisp snare sound.
Bass:
A "small marching bass" best describes a big band
bass drum. The only muffling is usually a couple felt strips stretched
across the inside of both heads.
Toms:
They should sing! Overtones are welcome here.
Buzzing Snares on Snare Drum.
There are quite a few instances where the sympathetic resonance
of the snare drum snares with other instruments (especially Brass
instruments and other drums) are rather annoying. Also many drummers
face the problem of sympathetic resonance caused by the nearby
tom toms.
What can be done to diminish this problem?
The cause of the problem is the fact that the tuning of the snare
drum shares some components (overtones that is) with other instruments.
Most modern snare drums are rather sensitive to this problem
and one step would be to alter the tuning of the snare drum as
to avoid as many as possible common overtones. But this is only
partly a solution, as the snare drum itself is very rich in overtones
(independent of tuning) and removing one overtone (by retuning)
is likely to introduce a new one! A completely different approach (one that I have used many times)
is to put some very thin piece of paper between the snare and
the bottom head. You have to experiment a bit with thickness
and placement, but it is possible to reduce the problem a lot.
Another solution would be to experiment with different heads. In the past
(40 years ago) it was hardly a problem because the calfskin head (and its
companion snare head) were rather insensitive to this problem. It is thinkable
that the use of calfskin-like heads (e.g. Fiberskin 3) also reduces the effect. Recently asked questions
Matched or Traditional Grip?
The Matched grip (both hands alike) is the most used grip worldwide seen. Almost
all percussion playing cultures (e.g. Africa, India, China, Japan, Indonesia,
and South America) use this grip because there is no need to do it in any
other way. It is also the most natural way of playing and it has been in
practice for thousands of years.
Enter the Traditional grip …
The Traditional grip came into use when the players started to
carry their drum (with the help of some belt) on their body, usually
their left leg. In this position it was very uncomfortable to use
the old (matched) grip and players adjusted their grip to this
new playing. This happened somewhere between 1300 and 1500 in Europe.
This traditional grip became the standard grip in all military
styles of playing and finally was adopted the grip of playing the
snare drum. When these very players moved into the jazz scene (around
1880-1900) this grip was used for their (rudimental style) drum
set playing.
During the years following this period the traditional grip was in use by almost
all jazz drummers and also all blues and rock drummers used this grip. The
turnaround (back to the matched grip) came with Ringo Starr who influenced
so many drummers in the great Beatle era. Before that time a drummer was
often measured by his grip: Trad was OK, Matched wasn't! But nowadays even
in the drum corps style drumming the Matched grip is widely in use.
Both grips have their strong and weak points and both have their own advocates.
For the normal Jazz drum set - Snare, 2 toms, 2 cymbals - the Traditional
grip is all you need. All instruments are within reach of both hands, although
playing time with the left hand (on the left cymbal or hihat) is a serious
problem. But in normal playing practice that was almost never done either!
When the drum sets in use grew bigger (getting more toms and cymbals) the
need for more (and equal) span was obvious and for this reason the Matched
grip was (and still is) the perfect solution.
In the field of classical percussion setup pieces and for many brass band pieces
also, players who were trained in the Traditional grip often had to face
the problem of performing all kind of pieces in awkward playing positions
which could be easily avoided by using the Matched grip. Rapid stick changes,
movements over many different instruments (2 bars vibes, 5 bars wood blocs,
1 bar marimba, another bar with marimba by left hand and triangle with right
hand.... Do you get the idea?) are easier to perform when you can use the
same grip for all instruments. For that reason the training of a classical
percussion player should focus on the Matched grip.
Either grip is equally suited to play any rhythm but Traditional grip is sometimes
the only way to perform good sounding brush patterns. On the other hand,
there are many great drummers who have developed some new brush patterns
that are very hard to play with Traditional grip.
And then, of course, there is the point of muscle efficiency.
In May 1967 , Gene Pollart published an extensive article in
which he compared both grips The conclusion of Pollart:
"...The matched grip involves more coordination of the participating
muscles, has more potential power at its disposal to help control
the action of movement, and because of its simple movement and
more potential power, it will produce more sustained endurance."
Of course there is some controversy to Mr Pollarts remarks. Everyone
has his or her own view, of course, and here is mine.
Traditional grip was created because the drums that the field drummers used
were tilted, due to the strap. They discovered no scientific evidence that
proved the left hand should do something completely different from the right
hand. They didn't pick it because they could play faster, or do cooler visuals,
or to be different. They did it because the drums were at an angle, and the
easiest way to hit the drum was to screw up your hand so you could strike
it level.
Today, we are no longer the victims of faulty drum straps. With revolutionary
technology, we have discovered a way to make our drums STRAIGHT (as displayed
in many of today's American marching corps bands. You no longer need to turn
your hand upside-down to play. I'm sure if the drummers of the 1500's were
here, they would go right back to playing matched grip.
Some other food for thought:
If traditional grip is better, than why don't we use it with BOTH
hands? It doesn't make sense to me that what is good for one hand
is not good for the other. Since drums are LEVEL now (I'd like
to emphasize that) we can use any grip we want. But it only makes
sense that both hands should do the same thing, and I haven't seen
an advocate of traditional grip yet that did it with both hands.
I've also heard that traditional grip is better because there are things you
can do with it that you can't do with matched. I would agree with this -
however, I would point out that you can hold your sticks any number of strange
ways and do things you could never do with matched grip, or traditional either,
for that matter.
To me, it is obvious that matched grip is the easiest way to learn and should
be the standard everywhere. If you want to hold your sticks funny later,
go right ahead. But learn to play the drum first.
Reasons why I believe matched grip is better than traditional grip:
- More power (or volume) when you want it
- Better finger control: With traditional grip, only the two
fingers on top of the left stick (index and middle fingers) are
controlling the downward motion of the stick. With matched grip
(and thumb on top, not off to the side), all fingers are controlling
the downward motion of the stick. For a demonstration of this,
see the Dave Weckl video "Back to Basics".
- Requires less patience to learn. Therefore, more encouraging
and less frustrating for young drumming students.
- Better angle for fuller-sounding rim shots
- When you learn matched grip you're also learning the grip for
marimba, glockenspiel, timpani, etc.
- The hands can play more evenly and sound more even
- Better balance on the drumset, because matched grip is symmetrical
and traditional grip is asymmetrical
- Easier to manoeuvre around large drumset
- Easier to play left-hand ride on hi-hat or on cymbal on left
side of drumset
Renaissance/Calfskin
heads or plastic heads on Timpani?
Especially when used on Timpani, the Calfskin head has superior
tone quality over (all types of) the plastic head. But its sensitivity
to weather conditions makes it a poor candidate for player
controllable performance quality. Therefore many players
prefer the plastic head for most situations. These days' heads
such as the Remo Renaissance offers a close option to calfskin
without all the problems associated with calfskin however producing
a quality of tone similar to using calfskin.
High Timpani drum left or right?
The way players place their timpani with the high timpani on the
left or right side, varies per country. And even in one country
not all players use the same placement. The problem is not restricted
to timpani, but all instrument set-ups where instruments of varying
pitch have to be placed next to each other, face the problem of
how to place the instruments in such a way that playing becomes
easier (or at least not more difficult).
The reasons for those different placements are obscure and nobody really knows
the correct answer, because there is no correct answer to
this question. Through the whole history one can see both possibilities used
with equal chance. If we were forced to come up with an international accepted
setup, then we should select the high drum right solution, because that's
the way the piano and tuned bar instruments have their layout (But no right
handed drummer, playing the drumset , in the world would
agree with this setup!).
We have to make a choice then, and this choice is highly influenced by the
country where you live and study, and the custom setup used in your country.
Problems arise when people from different cultures play or study together,
as is was case at the music college where I studied. We have students from
all over the world that studied the instrument already in their home country
and are now studying with us.
One thing should be clear: if someone uses a certain setup for the timpani
(e.g. high on the left), then this setup should be used for all other multi-instrumental
set-ups (e.g. 5 toms and 4 cymbals). This has simply to do with ease of playing
and movement of hands. Sometimes players share instrument-groups in the same
piece, and it would be very awkward to constantly have to think about which
hand to use! This should be a natural decision (acquired by sufficient practice)
that all players should have.
I must admit that by sufficient practice it is very well possible
to learn to play on any setup, although the one that one has learned
initially is more comfortable.
I have always have played Tympani with high drum(s) to the right,
even a 5th "piccolo" timp was at my far right. I have
not found, at least in the orchestral, brass band and show playing
that I have done, any need to set up another way. I prefer it because
of my mallet and piano training being based on Middle C (L side-low
pitches, R side - high pitches. When called upon to cover many
different parts at one time, it helps if all pitched instruments
are based on the same direction from low to high.
Instruments, covers, sticks, repairs and all your
percussion needs
There are many high street music shops that offer good offers
on all types of instruments. However, for that extra special service
when buying any of your percussion related needs, I have tended
to use one main supplier.
JamPercussion is run by two highly experienced professional musicians
(Graham Johns & Tony Lucas), who can offer expert advise, a
quick efficient delivery service, excellent after purchase-care,
and more importantly can obtain almost any percussion related requirement
from all over the world.
Dave Griffiths
© 4BarsRest
 back to top
|